
In the spring of 2024 we installed the majority of the desk/workstation in the pilothouse. The pilothouse needed a few more pieces of trim to finish it off. On the starboard side the scupper hoses come down both sides of the settee area. The original solid teak covers were damaged so new ones were needed. The covers were fabricated out of the same plastic product we used for the headliner. Teak trim was also fabricated to cover the inside and outside edges. The white headliner for this area was painted and installed with the teak trim. One light was installed in the middle of the headliner.
 |
| Ugly exposed scupper, fuel and bilge pump hoses |
 |
| Headliner and enclosures built to cover hoses |
 |
| Teak trim applied to inner and outer edges |
 |
| Forward and aft covers trimmed out |
 |
| Trim added to pilothouse window face |
 |
| Completed headliner, light and covers with trim |
The teak trim was added to the port side top of the navigation console. This piece was fabricated last fall but was finally varnished and ready to go on. This covered up the transition between the maple tambour and the white solid surface. I used thickened epoxy to glue this on. We did not want to use any fasteners to mess up the beautiful varnish.
 |
| Area taped off ready for thickened epoxy |
 |
| Dry fit the new piece |
 |
| Trim glued and held in place until the epoxy dried |
 |
| Wow, it looks amazing! |
 |
| Another angle |
 |
| Looking awesome next to the countertop |
Moving on to the port side of the pilothouse. A face frame was fabricated to cover up the cubby storage area above the desk. The maple wood was cut and planed to 3/4 inches think. The opening was not square so the face frame had to be custom built to fit the area. It was slightly wider on the forward end. An inset piece of laminate was used to cover up the aft opening. This area could be used for instruments, AIS, or a VHF radio.
 |
| Cubby area above the workstation |
 |
| Newly fabricated maple face frame with shaker inset |
 |
| Kreg jig screws were used for construction |
 |
| Face frame rough fit |
 |
| Drilling Kreg jig holes |
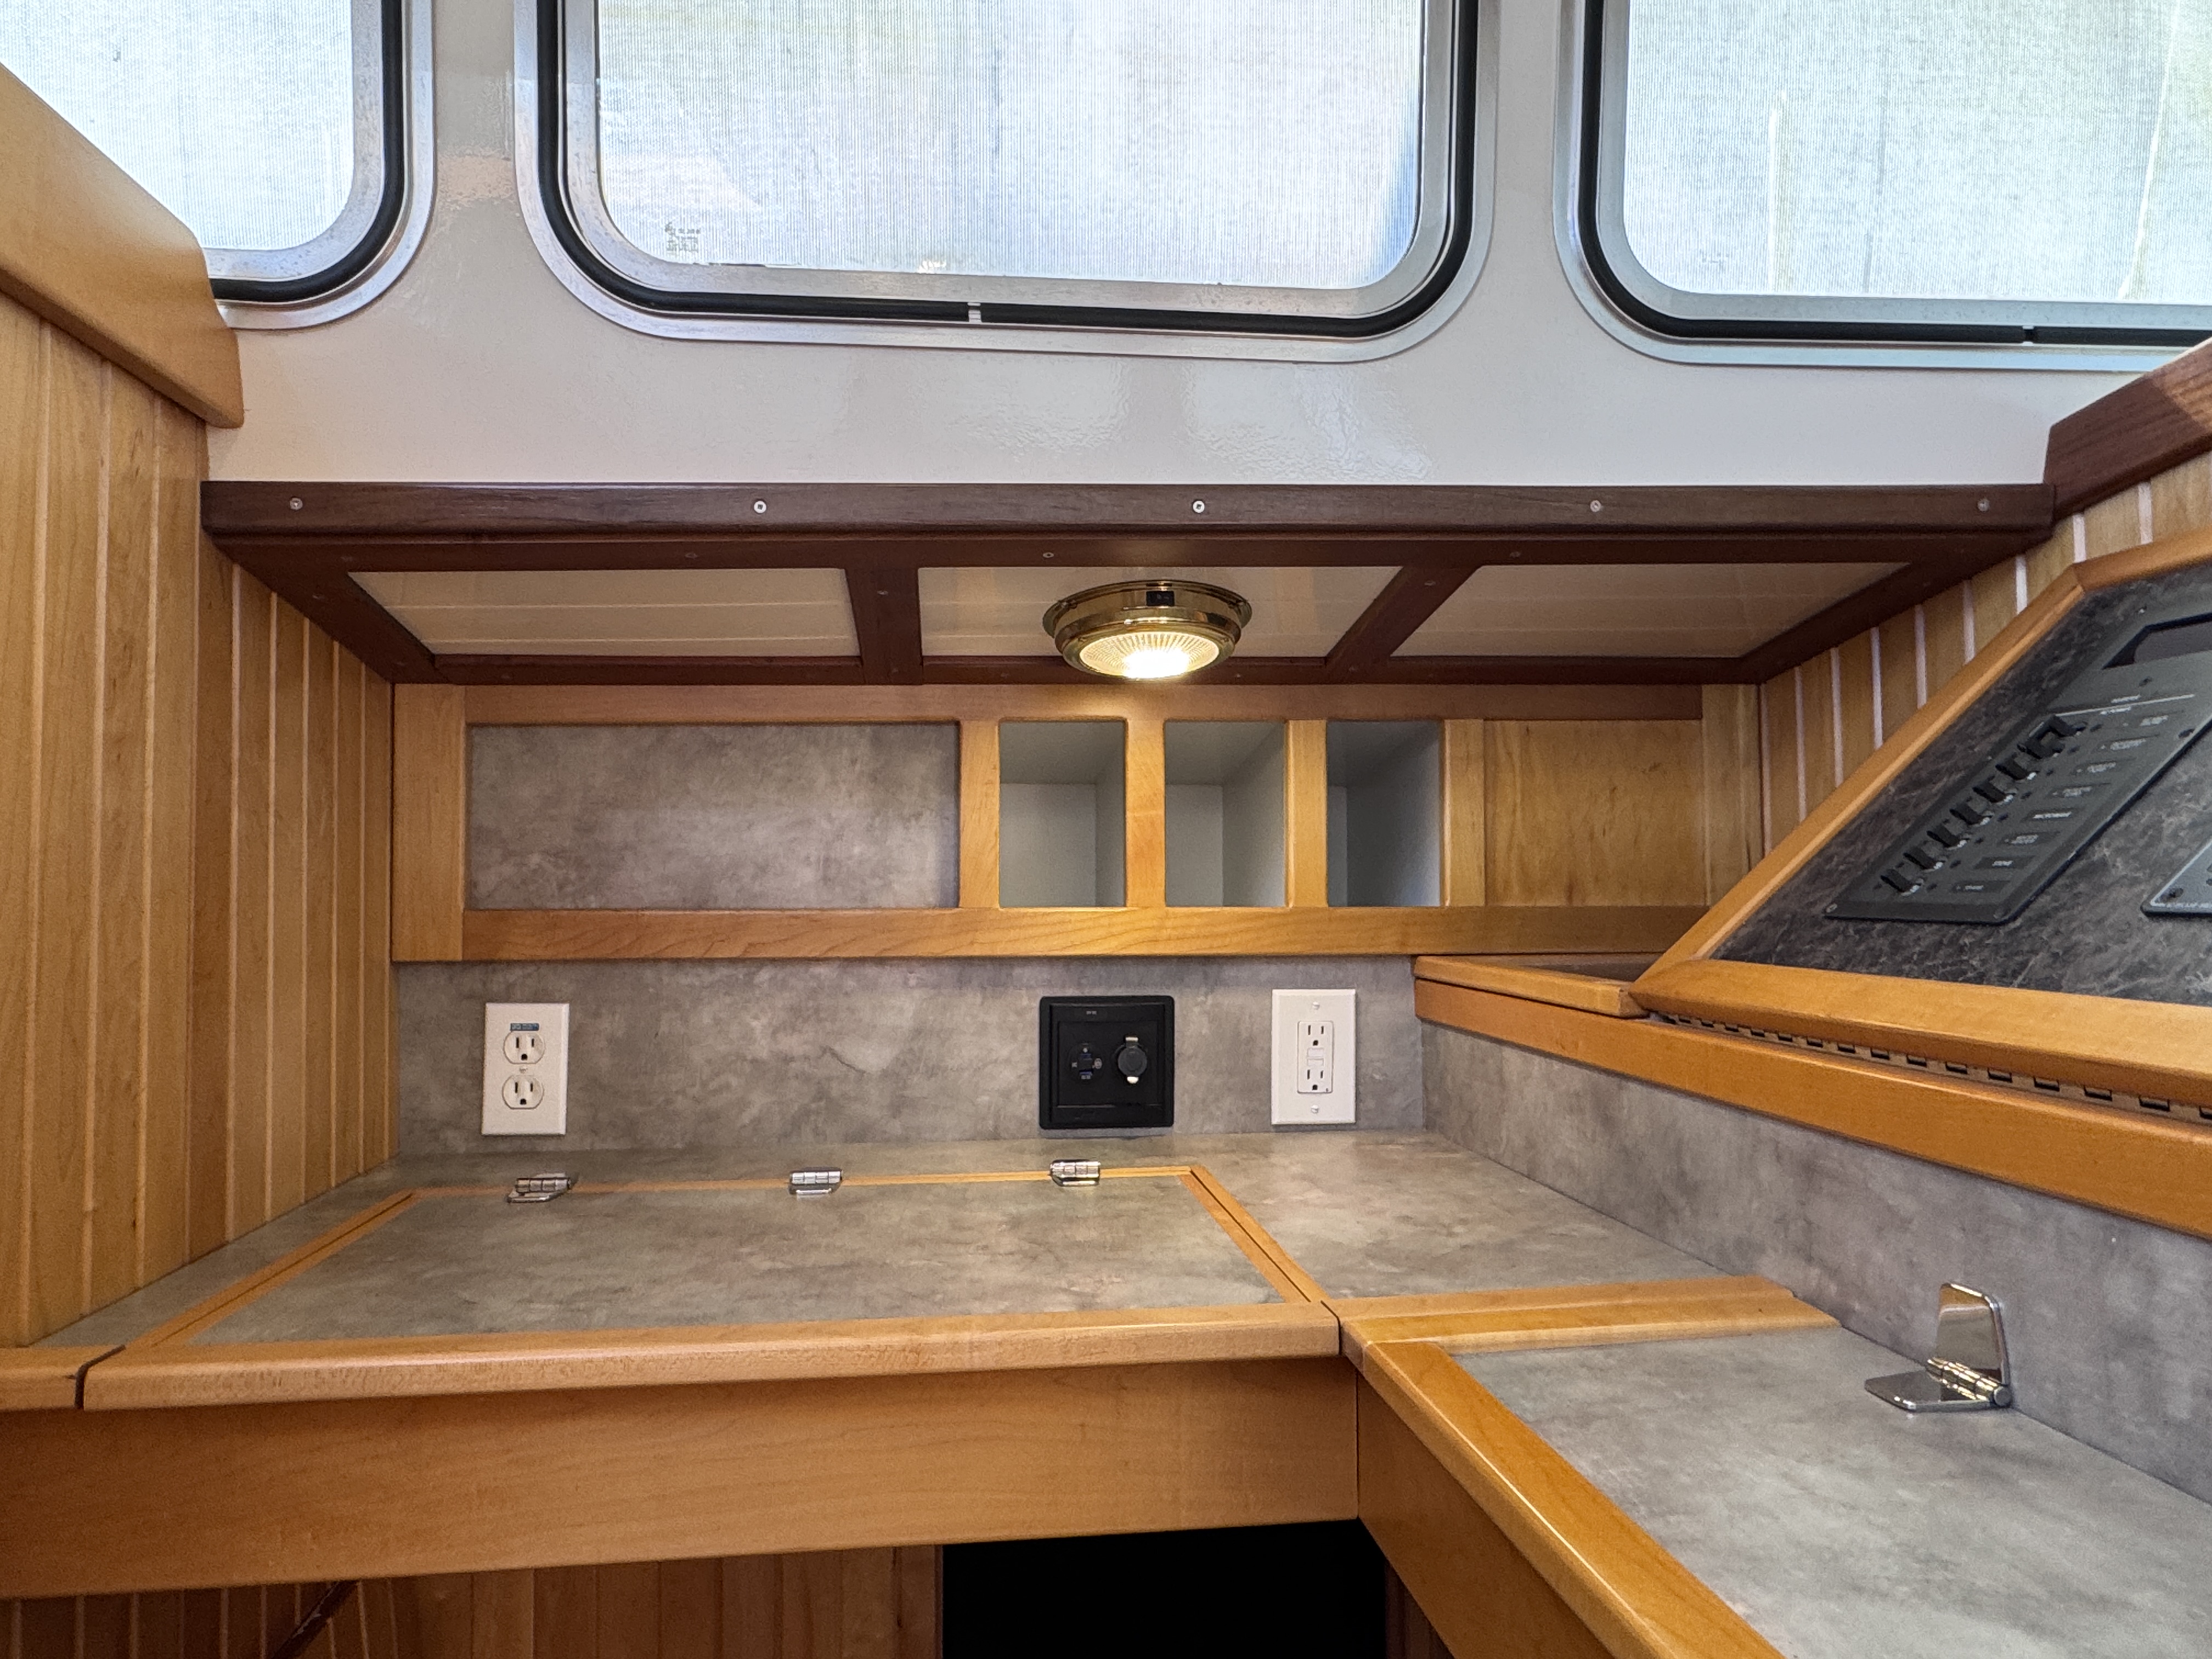 |
| Finished headliner cubby face frame and light |
 |
| Foreward view |
 |
| Aft view |
 |
| Trim held in place while epoxy dried |
 |
| Fiddle detail |
 |
| Fiddle epoxied and reinforced with a block on the back |
 |
| Fiddle epoxied to locker |
 |
| Doors mounted with hinges and push button latches |
 |
| Final trim added around the DC breaker panel |

 |
| Vents added in hatch for inverter cooling |
 |
| Inverter installation below desk |
Mark
No comments:
Post a Comment