February - April 2021
V-Berth Reconstruction
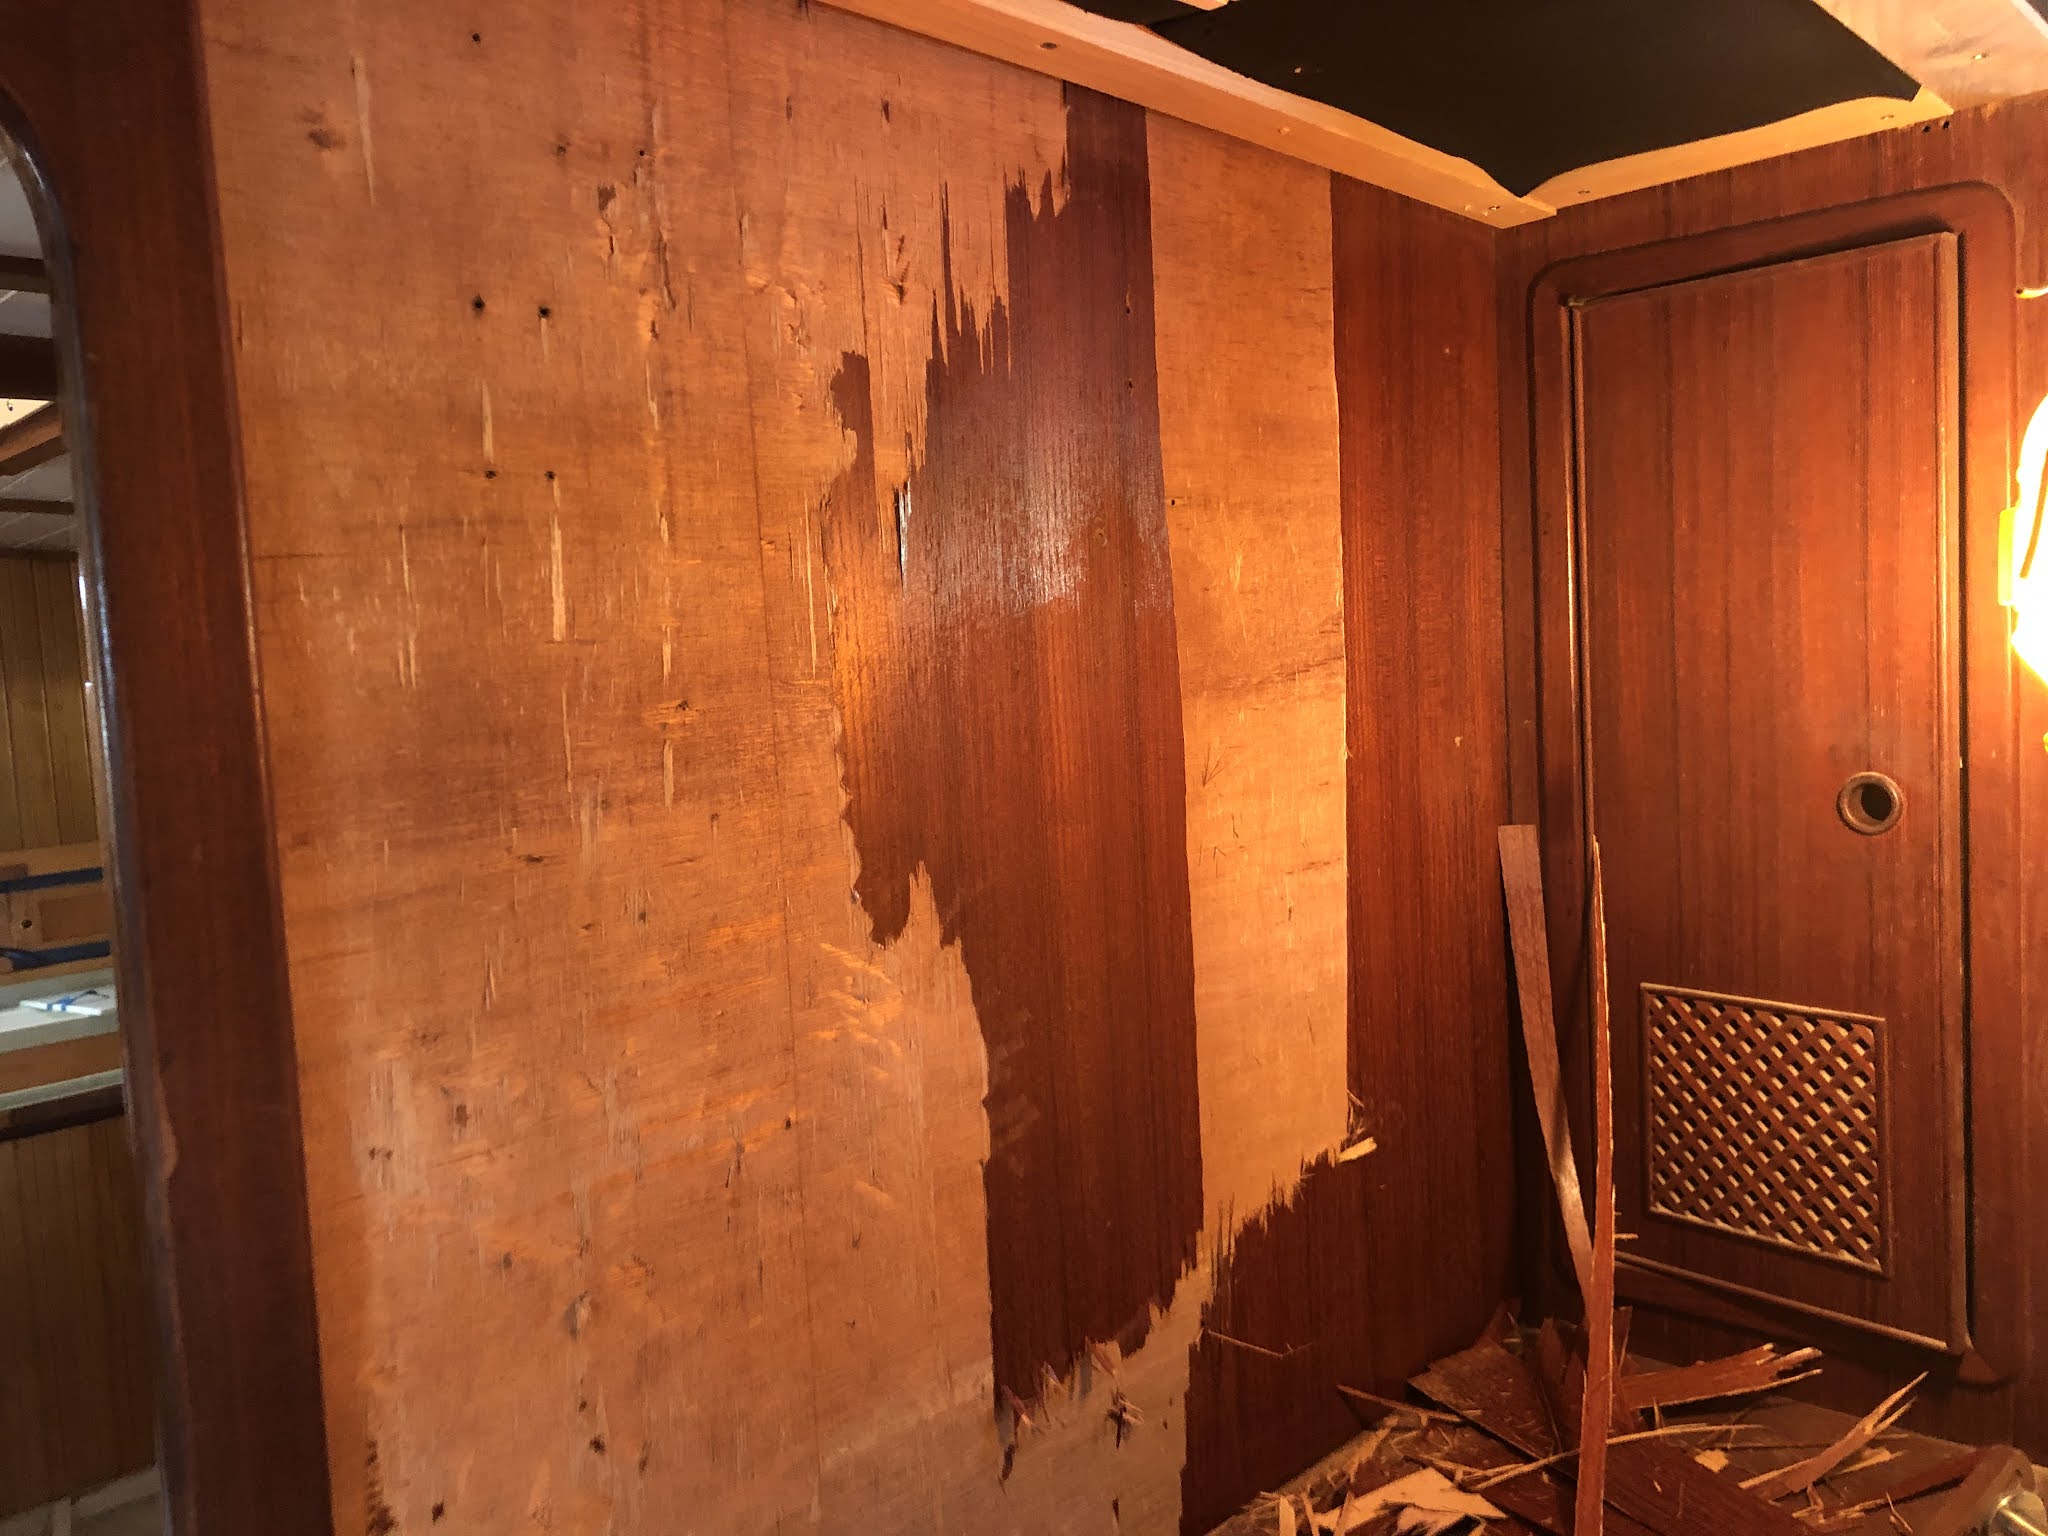
After the completion of the aft headliner we moved onto addressing the v-berth rebuild. The portlights in the v-berth were neglected by the previous owner so the majority of the cabinetry was rotten. It was removed several years ago with little progress since then. The bulkheads were originally covered with a teak veneer so all of that was removed. I spent the next two months working on the v-berth removing the last of the rotten wood, cutting all the maple tambour for the bulkheads, building cabinets, shelves and flooring.
The original layout of the Pan Oceanic 46 v-berth had a nice queen sized berth with a cabinet on the port side and cabinetry and hanging locker on the starboard side. The berth was in good shape so the focus was on the wall coverings, bulkheads, floor, headliner and cabinets.
 |
| Removal of the teak veneer |
 |
| Peeling off rotten teak veneer |
 |
| Aft v-berth bulkhead port side |
 |
| V-Berth aft bulkhead starboard |
 |
Forward bulkhead and chain locker
|
Once the bulkheads were all clean the maple tambour was measured and roughed cut to cover all the surfaces. The maple tambour was chosen to lighten up the cabins. The old teak was just too dark. Once cut and fitted these pieces were all taken down for a final spray coat of Epifanes matte varnish.
 |
| V-berth aft bulkhead tambour |
 |
| Berth face and step |
 |
| Step for berth rebuilt and tambour fitted |
 |
| Cabinet bulkhead tambour port side |
 |
| V-berth forward bulkhead tambour |
Slats were fiberglassed onto the insides of the hull to allow attachment of sheets of material and trim. For this we used 1/8 inch luan plywood. We sealed both sides with epoxy resin and painted them white with Interlux Brightsides paint. Brother Brad is becoming quite the spray painter and the results turned out amazing. Armaflex closed cell insulation was then applied between the slats.
 |
| Port Hull slats and insulation |
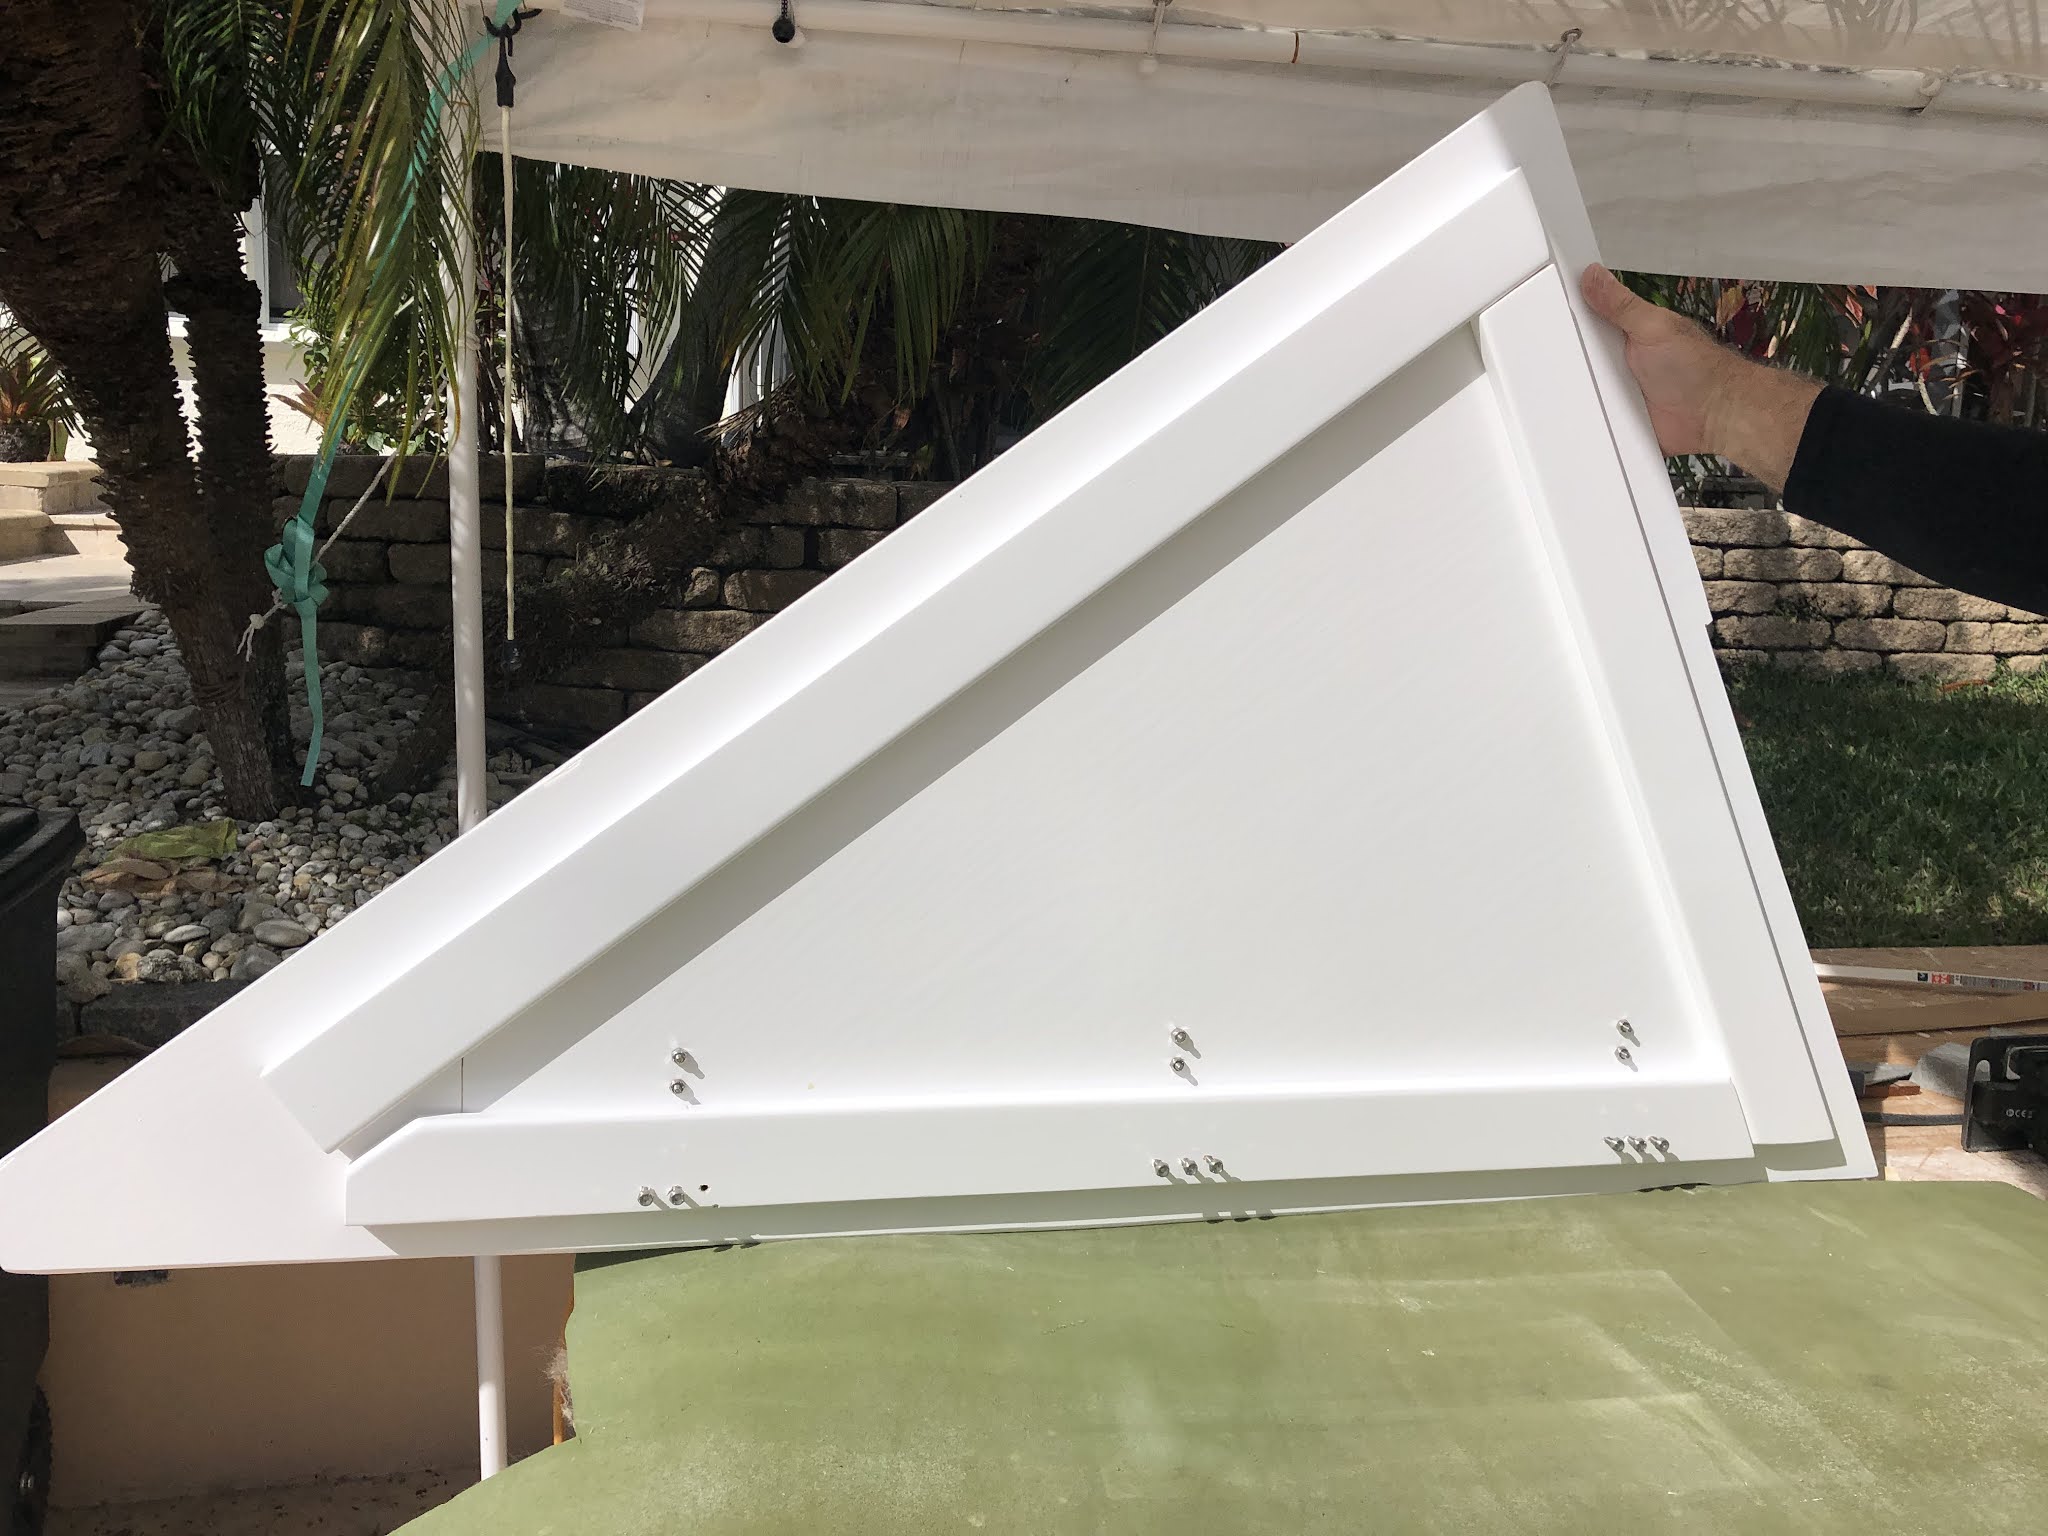
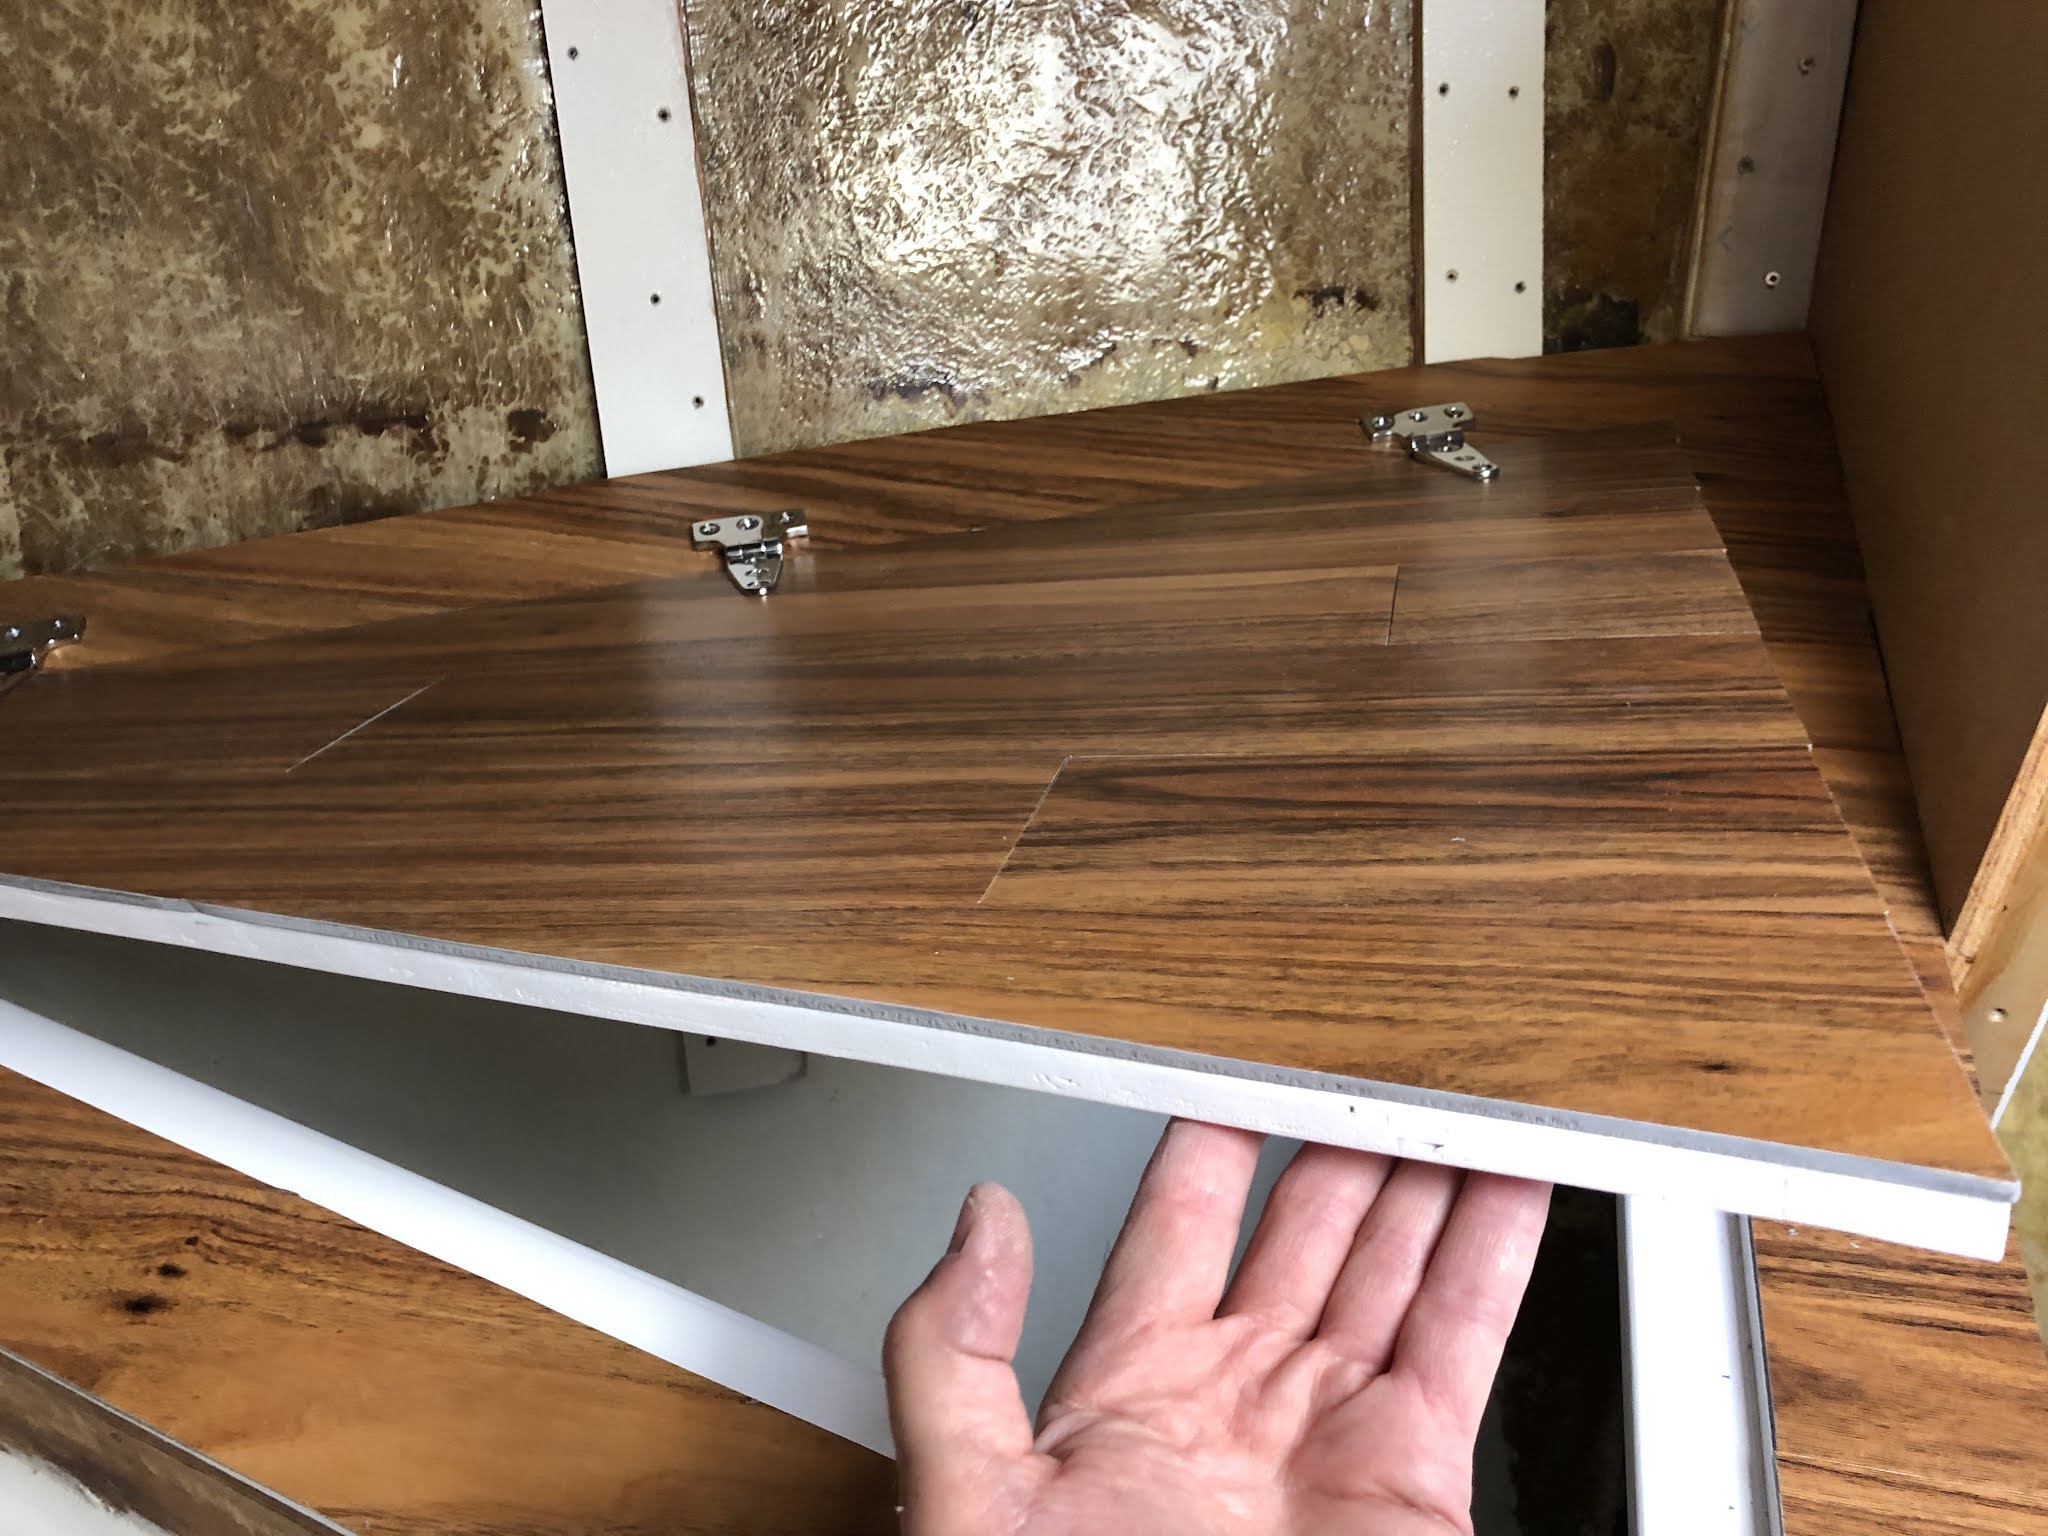
One last piece to fabricate in the v-berth was the locker on the starboard side. A triangular piece of plywood was first cut. A hatch was cut out of that and hinges were attached. Flooring material was used to cover the top of it. This locker will be used for sails or storage.
 |
| Bottom side painted with hinges attached |
 |
| Fitting the flooring material to the hatch |
 |
| All pieces glued up |
Up on deck we redid a couple of the biggest sections of non skid. This process is the same as we have done in the past. We copied the process used by Youtuber Andy from Boatworks Today. We have picked up many of our fiberglassing and painting tips from his channel. I have a Phd from Youtube University as we like to call it. He has a great channel and his nonskid application is a must watch video.
We sanded the old nonskid off, wiped down the surface and applied a layer of Awlgrip primer. If the primer is recoated within 24 hours it still chemically bonds. The next day we applied a coat of Awlgrip paint and then generously sprinkled on the Soft Sand non skid product. We used the medium grit Soft Sand which is easy on the feet. The next day we swept off the excess and gave it two final coats of Awlgrip paint.
The toughest part of the non skid is getting the areas taped off correctly. We used blue painters tape with great success. Find a jar lid or bottle that resembles the radius you want to use for the inside and outside corners. Place multiple layers of tape over the corners, place the jar lid on the corner and use a razor blade knife to cut the radius. This will give you consistent radiuses for your project.
 |
| Sand Shakers made from plastic jars |
 |
| Soft Sand sprinkled on |
 |
Port section primed
|
 |
| Radius taping detail |
 |
| Completed sections on the bow |
 |
| Starboard side section sanded and taped off |
 |
| Details around the mast step |
Wow, that was a busy few months! The v-berth is finally taking shape. We still have alot of varnishing and painting to do and we will be back in 2022 to put it all back together. I like to think we are getting close to the end of the project. I have so many of my friends ask me, is the boat done yet? Honestly, is any boat every done? In the mean time, it has been so much fun spending time with my brother and working on this old boat in tropical, sunny Florida!
~~~ Sail On /) ~~~
Mark